
| Tools and Materials List: Materials 12 in. x 8 in. Retaining Concrete Garden Wall Cap Landscape Fabric Gravel / Drainage Aggregate Tools Shovel Circular Saw Masonry Circular Saw Blade |
This bed as pictured will require approximatley 160 of the 12 in. x 8 in. Retaining Concrete Garden Wall Cap blocks. Before building the walls of this bed, the base needs to be laid down. The base consists of paver base 4-6 inches thick at least 4inches wider than the block. Once finished with construction, fill it with planting medium, set your plants and wait for your harvest. | Instructions: BASE Step 1 With the layout marked, you can begin digging the trench. To bury the first row about halfway, dig the trench about 4 to 6 inches deep and 12-14 inches wide. Caution Before beginning any excavation, check for underground utilities. Call the North American One Call Referral Service at 1-888-258-0808 (or just dial 811) for a national directory of utility companies. Step 2 Use a torpedo level to ensure each block is level and each section of the wall remains level. Step 3 Tamp down the dirt with a hand tamper and keep it level. Step 4 Fill the trench with about 3 inches of paver base, spread it with a rake, and tamp it down. Tamping the base provides a strong foundation. When it’s all level, you can begin installing the blocks. WALLS Caution Wear safety glasses and work gloves when using a chisel on the blocks. Step 1 Beginning at the end with the lowest elevation, set the first block in place and check for level side-to-side and front-to-back. Step 2 Place the next block, making sure it’s even with the first. Continue installing the first row, periodically checking for level. Good to Know A 6- to 9-inch torpedo level is useful for checking level of individual blocks or checking level front to back. A longer carpenter’s or mason’s level — 24 inches and up — is good for checking level over several blocks. Step 3 To level the rows and keep the blocks even, fill in under low blocks with paver base or tap down high blocks with a rubber mallet. Step 4 To complete the rectangle, each side will overlap the previous block. 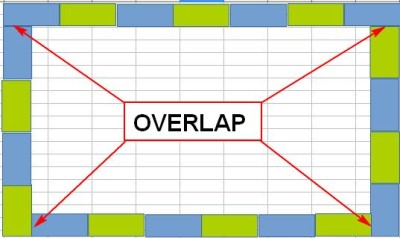 Step 5 To start the second row, overlap each block so that the joints do not line up. Caution Wear safety glasses, hearing protection and a safety mask / respirator when cutting block. Follow the saw and blade manufacturers’ instructions for use and safety. Step 6 Continue around the perimeter of the rectangle Step 7 For the last two rows of full blocks, apply concrete adhesive to the wall block tops, then set the next row of blocks in place. Good to Know If you’re adding block caps, apply adhesive to the top row of block before placing the caps. |